There are many tools and services for hosting static websites.
-
Using a Hosting Service: This is by far the easiest way to deploy a static site. You simply connect your repository to the service of your choice and presto you have a live site. Vercel, Netlify, and GitHub Pages are all great options for this type of deployment.
-
“Self Hosting”: If you already have a VPS(Virtual Private Server) up and running you may choose to serve your site using NGINX or Varnish paired with a CDN(Content Delivery Network) like CloudFlare or Fastly to distribute your content as close as possible to your readers.
-
AWS Services: AWS offers several services for hosting static content.
- AWS S3: If all you care about is getting your content live, then this is the simplest method. Simply upload your content to an S3 bucket and use the S3 URL to access the site.
- AWS Amplify: This is closer to the experience you get with a hosted service and uses S3 and CloudFront.
- S3 + CloudFront + Lambda@Edge: This option requires you to manually configure each service yourself. It’s the method we’ll cover in this article.
So you may wonder, why should I choose option 3? If you are trying to meet specific business needs, this option provides a flexible, global environment that integrates with other AWS services. If you are just deploying your blog then you have absolutely no way to justify this option; it’s simply a more advanced exercise in learning AWS than the previous options.
Note: The AWS UI may has changed since this article was published
IAM User
First of all, please don’t use your root account for this! Create an IAM user for managing AWS resources.
S3
The static files for your site will be deployed to an S3 bucket. Create a bucket in S3 like example.com. You can
upload your site directly to the root of this bucket. But it may be helpful to serve the files from a subfolder such
as prod/public.
Note: S3 bucket names are globally unique. It’s possible that someone else is already using the bucket name you want.
Bucket Settings:
-
Properties:
- Static Website Hosting: Since the files will be served from CloudFront and not S3 leave this option disabled.

Leave static website hosting disabled.
- Static Website Hosting: Since the files will be served from CloudFront and not S3 leave this option disabled.
-
Permissions:
- Block Public Access: Block all access since CloudFront will be granted access using a Bucket policy
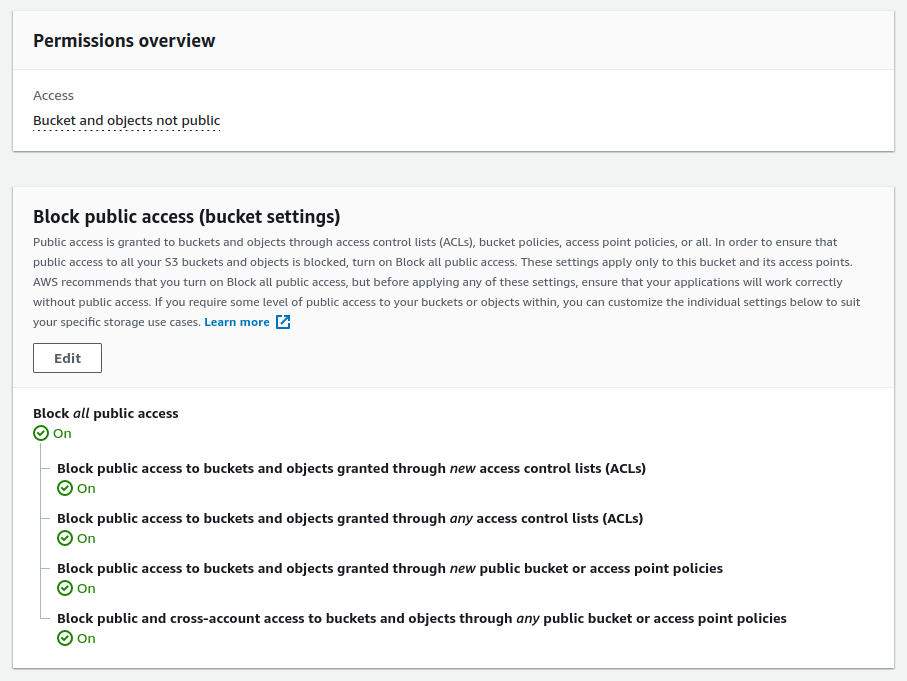
Block public access.
- Block Public Access: Block all access since CloudFront will be granted access using a Bucket policy
Now upload a test page to your S3 bucket.
<!DOCTYPE html>
<html lang="en">
<head>
  <meta charset="UTF-8">
  <title></title>
</head>
<body>
  <h1>Served from S3</h1>
</body>
</html>
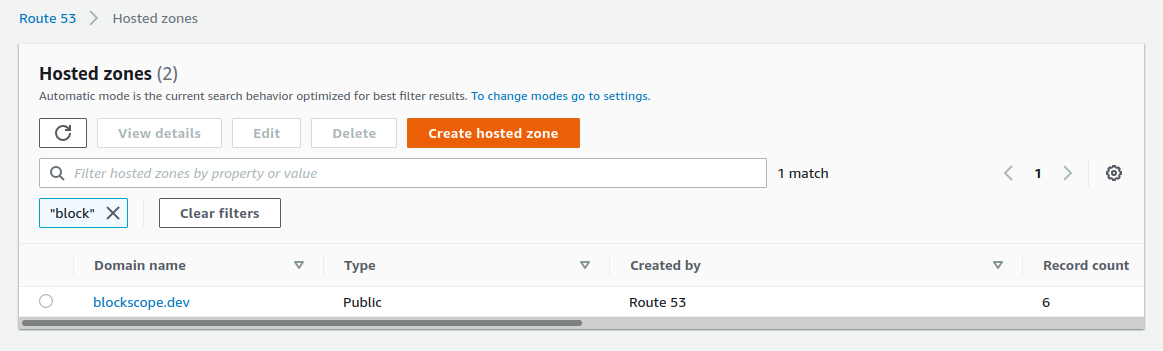
Route53
Using Route53 makes it trivial to add SSL to your CloudFront distribution later, which is why we need to setup the domain name now. The alias record for the CloudFront distribution will be created later. You can use a domain purchased from AWS or another domain registrar. The only thing to do in this step is to add your domain name to Route53 as a new hosted zone.
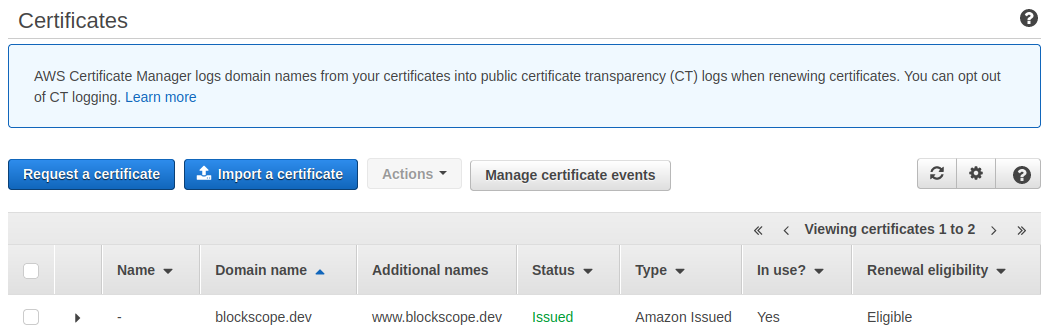
Certificate Manager
Now navigate to Certificate Manager, request a certificate, and add the DNS validation to your Route53 domain.
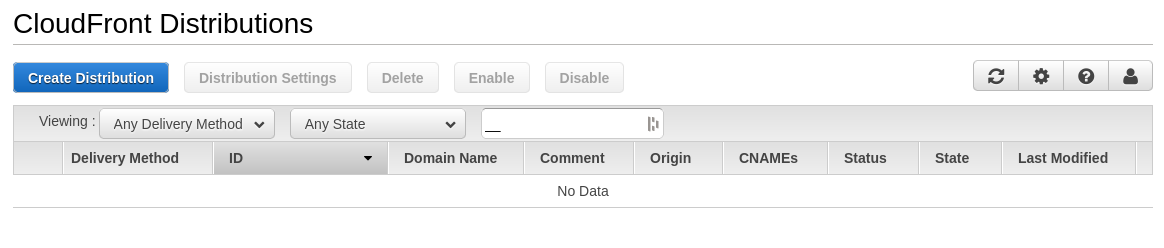
CloudFront
Create and configure a new CloudFront distribution.
There are many configuration options in CloudFront. I’m only going to mention the relevant ones.
- Origin Domain Name: Select your S3 bucket here.
- Origin Path: If you choose to serve your site from a subfolder such as
/prod/publicset that here. - Viewer Protocol Policy: Set this to “Redirect HTTP to HTTPS”
- Price Class: You may want to change this if you aren’t intending to reach a global audience.
- Alternate Domain Names: Enter your site domain names,
www.example.comandexample.com. - SSL Certificate: Select “Custom SSL” and choose the certificate you created in
- AWS Certificate Manager. If you have trouble, make sure that the certificate has been successfully issued. It should only take a few minutes after adding the CNAME record to Route53.
- Default Root Object: Set this to
index.html. - Comment: Add the domain name to the comment.
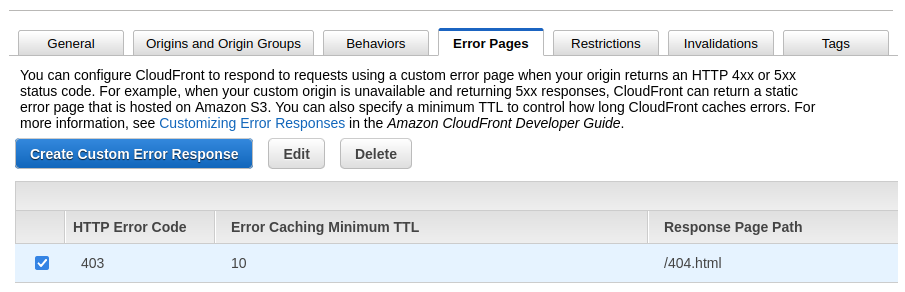
After creating your new distribution you may setup a custom error responses to prevent the default AWS error page from showing.
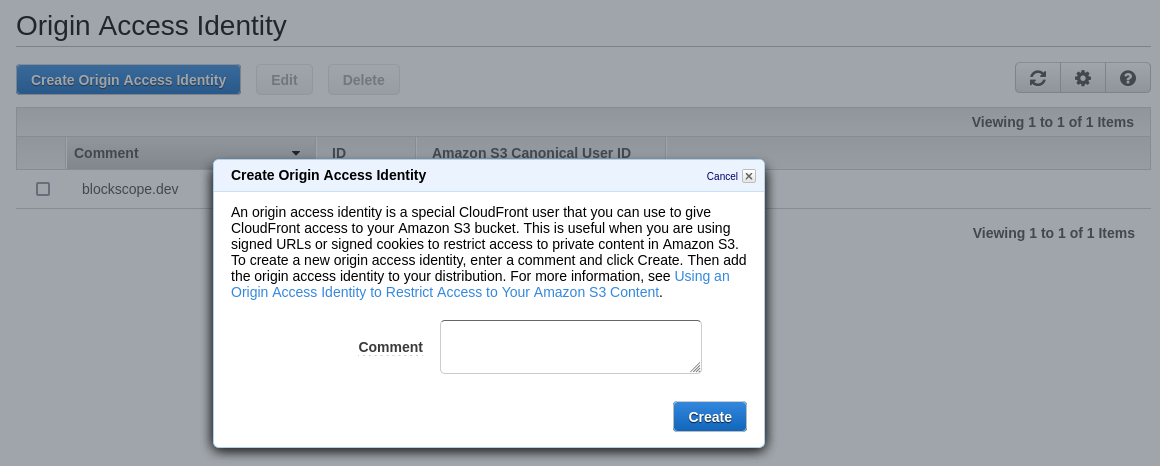
Origin Access Identity
Navigate to CloudFront and select “Origin Access Identity” under the security
section. Create a new OAI(Origin Access Identity) for example.com and add your
site name to the comment.
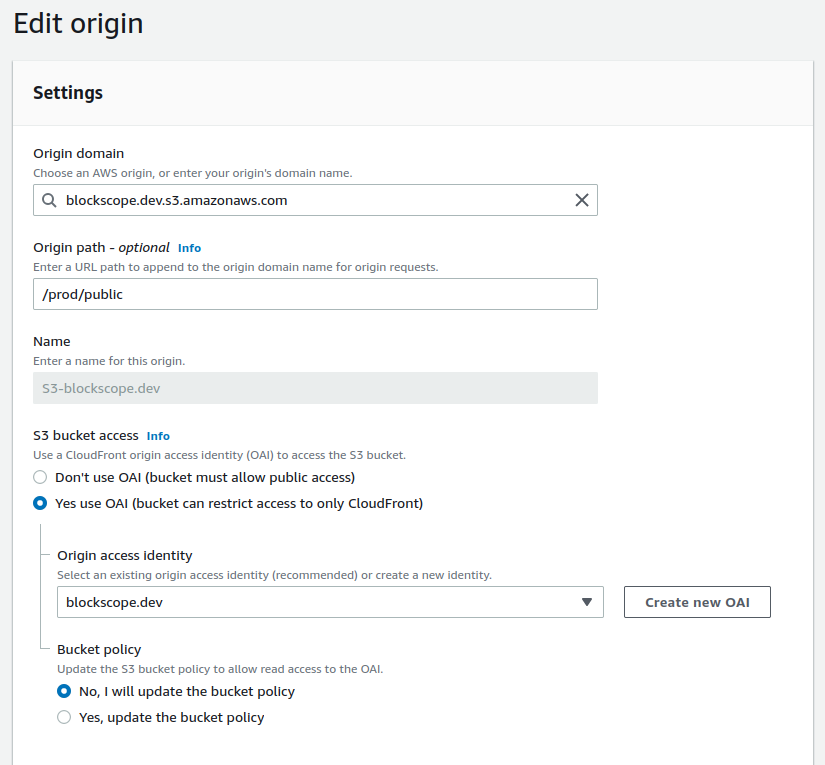
Now go back to your new CloudFront distribution and select the “Origins and Groups” tab. You should see one entry in the origins table. Select and edit that entry as follows:
- Restrict Bucket Access: Yes
- Origin Access Identity: Use an Existing Identity
- Your Identities: [Your newly created OAI]
- Grant Read Permissions on Bucket: No, I Will Update Permissions
Update the following policy with your bucket name and OAI policy ID.
You’ll need to use your actual bucket name here: "Resource": "arn:aws:s3:::<EXAMPLE.COM>/*".
{
    "Version": "2012-10-17",
    "Id": "S3CloudFrontAccessFor<EXAMPLE.COM>",
    "Statement": [
        {
            "Effect": "Allow",
            "Principal": {
                "AWS": "arn:aws:iam::cloudfront:user/CloudFront Origin Access Identity <OAI_ID>"
            },
            "Action": "s3:GetObject",
            "Resource": "arn:aws:s3:::<EXAMPLE.COM>/*"
        }
    ]
}
Now go to your S3 buckets permissions and paste the policy into your bucket
policy. Next go back to Route53 and create a new “A” record as a Route53 alias
to CloudFront and select your new distribution. Within a few minutes your site
should be live at example.com.
Lambda@Edge
Serving files directly from S3 is somewhat limited. By using Lambda@Edge you can do things like:
- setup redirects
- setup pretty URLs - no more
/my-file-name.html - redirect
www - redirect all page level URLs to end with a trailing
/
- setup pretty URLs - no more
- add a content security policy
There are four types of Lamnda@Edge functions:
- Viewer Request: handled when the request enters CloudFront
- Viewer Response: handled when the response leaves CloudFront
- Origin Request: handled when CloudFront requests files from S3
- Origin Response: handled when S3 responds to CloudFront
Below is the code for three of these to get you started.
-
Viewer Request:
Setup redirects
exports.handler = (event, context, callback) => { let request = event.Records[0].cf.request; const originDomain = request.headers['host'][0].value; const domainRegex = /^www\./ if (domainRegex.test(originDomain)) { const redirectURL = 'https://' + originDomain.replace(domainRegex, '') + request.uri console.log(`redirecting: ${originDomain} to ${redirectURL}`) request = { status: '301', statusDescription: 'Moved Permanently', headers: { location: [{ key: 'Location', value: redirectURL, }], }, }; }; const uriRegex = { trailingSlash: /\/$/, dot: /\.[a-zA-Z]{2,5}$/, // .xml, .html, .png } if(!uriRegex.dot.test(request.uri) && !uriRegex.trailingSlash.test(request.uri)) { const redirectURL = 'https://' + originDomain + request.uri + '/' console.log(`redirecting: ${request.uri} to ${redirectURL}`) request = { status: '301', statusDescription: 'Moved Permanently', headers: { location: [{ key: 'Location', value: redirectURL, }], }, }; } return callback(null, request); }; -
Origin Request:
Setup pretty URLs
exports.handler = (event, context, callback) => { // https://aws.amazon.com/blogs/compute/implementing-default-directory-indexes-in-amazon-s3-backed-amazon-cloudfront-origins-using-lambdaedge/ const request = event.Records[0].cf.request; const olduri = request.uri; const newuri = olduri .replace(/\/$/, '\/index.html') console.log("Old URI: " + olduri); console.log("New URI: " + newuri); request.uri = newuri; return callback(null, request); }; -
Viewer Response:
Setup the Content Security Policy.
exports.handler = (event, context, callback) => {

  //Get contents of response
  const response = event.Records[0].cf.response;
  const headers = response.headers;

   //Set new headers
   headers['strict-transport-security'] = [{key: 'Strict-Transport-Security', value: 'max-age=63072000; includeSubdomains; preload'}];
   headers['content-security-policy'] = [{key: 'Content-Security-Policy', value: "default-src 'self'; img-src 'self'; script-src 'self' 'unsafe-inline'; style-src 'self' 'unsafe-inline'; object-src 'none'"}];
   headers['x-content-type-options'] = [{key: 'X-Content-Type-Options', value: 'nosniff'}];
   headers['x-frame-options'] = [{key: 'X-Frame-Options', value: 'DENY'}];
   headers['x-xss-protection'] = [{key: 'X-XSS-Protection', value: '1; mode=block'}];
   headers['referrer-policy'] = [{key: 'Referrer-Policy', value: 'same-origin'}];

    //Return modified response
    callback(null, response);
};
Navigate to AWS Lambda and create three new functions. There may be better way to organize these. But I found it helpful to create the following functions.
example-viewer-requestexample-viewer-responseexample-origin-request
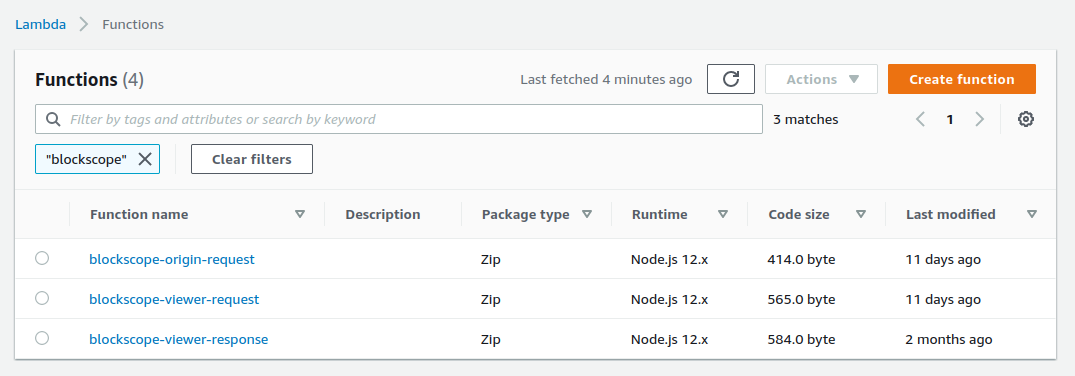
Note: At the time of this article (June 2021) you must select Node.js 12.x for your Lambda functions work with Lambda@Edge.
Covering Lambda in detail is beyond the scope of this article. So I’ll only cover the basic steps you’ll need to repeat for all of the functions.
- Paste the code for the lambda function into the
index.jsfile and then click ‘Deploy’. This won’t deploy the code to Lambda@Edge. - Create a test for your function by clicking the down arrow on the test button and then selecting a CloudFront template. The template provides the data required to test your function. You’ll want to provide a meaningful name and possibly edit the template to better suit your needs. You must click ‘Deploy’ before you can test the changes to your functions.

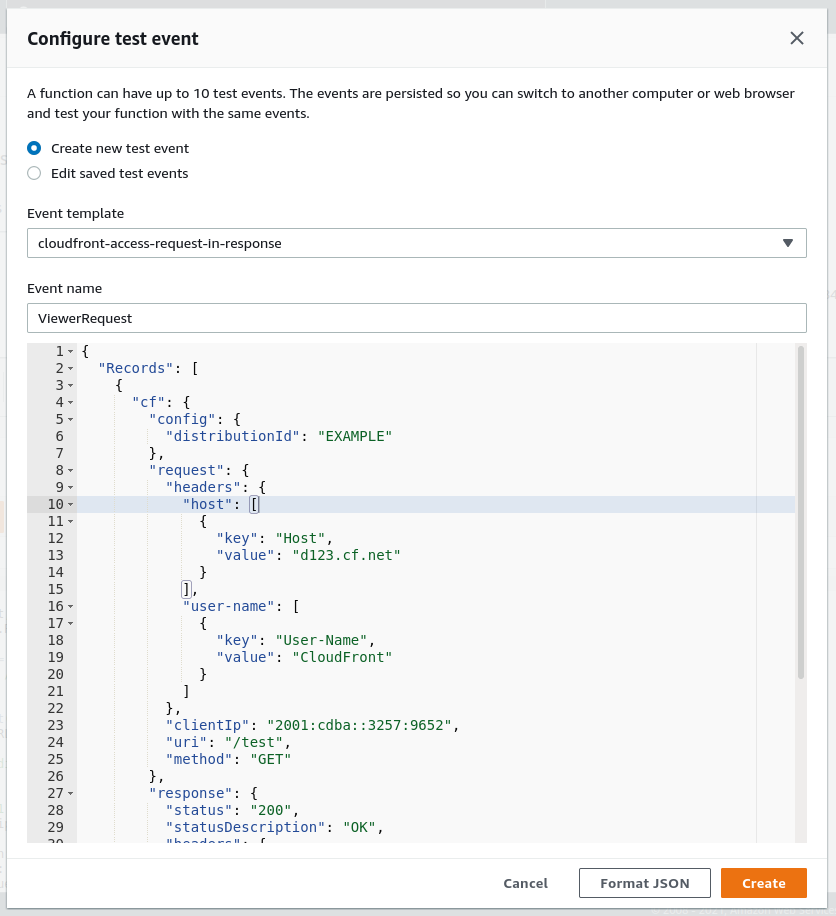
Example request templates are available here: https://docs.aws.amazon.com/AmazonCloudFront/latest/DeveloperGuide/lambda-event-structure.html
- Deploy your function to Lambda@Edge by clicking Actions -> Deploy to Lambda@Edge. The first time you’ll need to configure the target CloudFront distribution and CloudFront event type. For subsequent deployments select the option to use an existing CloudFront trigger. This will automatically increment the version of your function.

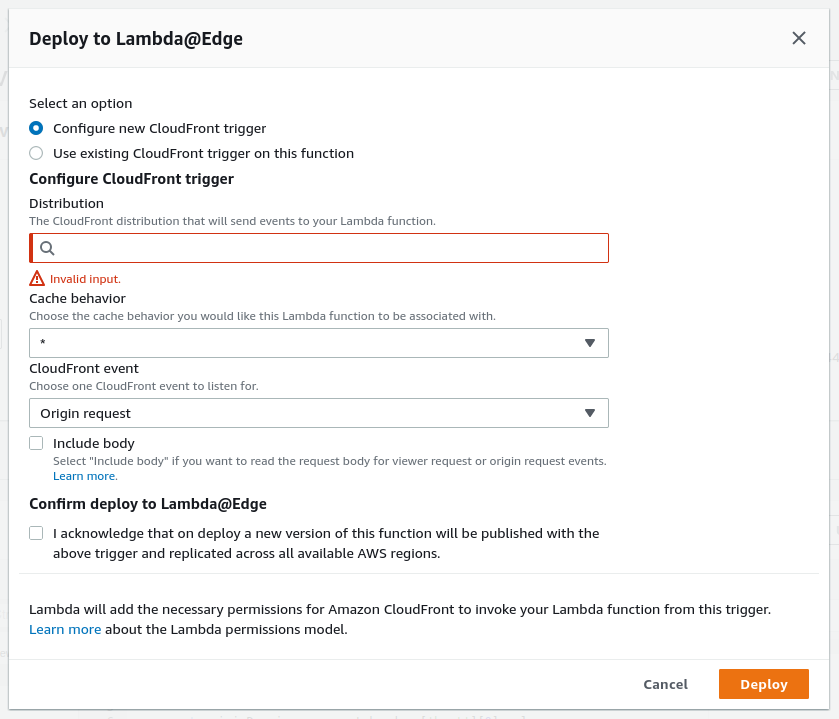
You can verify that the Lambda@Edge function was deployed successfully by navigating back to your CloudFront distribution, selecting the “Behaviors” tab and then selecting to edit the default behavior. You should see the new Lambda@Edge function under “Edge Function Associations”.
AWS CLI
It’s time to deploy your site! If you haven’t already, install the AWS
CLI python -m pip install awscli and
configure your credentials with aws configure. Again, do not use the
credentials for your root account. Instead consider creating a user
specifically for use with the AWS CLI. Now cd to your site files and sync the
production build to AWS. In the example below public/ is the local file system
directory containing the production build of the site. And /prod/public is the
destination folder
of the S3 bucket named example.com.
# sync files to S3
aws s3 sync public/ s3://<BUCKET_NAME>/prod/public \
  --delete \
  --exclude "*" \
  --include "*.html"
# set cache-control headers
aws s3 sync public/ s3://<BUCKET_NAME>/prod/public \
  --delete \
  --exclude "*" \
  --include "*.js" \
  --include "*.css" \
  --include "*.png" \
  --include "*.jpg" \
  --include "*.svg" \
  --cache-control "max-age=604800"
This command will invalidate the CloudFront content cache so that the changes will be served to users instead of the cached files.
aws cloudfront create-invalidation --distribution-id <DISTRIBUTION_ID> --paths "/*"
References
- https://docs.aws.amazon.com/AmazonCloudFront/latest/DeveloperGuide/private-content-restricting-access-to-s3.html
- https://aws.amazon.com/blogs/compute/implementing-default-directory-indexes-in-amazon-s3-backed-amazon-cloudfront-origins-using-lambdaedge/
- https://docs.aws.amazon.com/AmazonCloudFront/latest/DeveloperGuide/lambda-cloudfront-trigger-events.html
- https://docs.aws.amazon.com/AmazonCloudFront/latest/DeveloperGuide/lambda-event-structure.html
- https://docs.aws.amazon.com/AmazonCloudFront/latest/DeveloperGuide/private-content-restricting-access-to-s3.html#private-content-creating-oai-console